summer sewing
how I'm getting through hot & humid days

When we first moved out East, I was worried about the winters. Turns out it was actually the summers I’d have to learn to get through. It can be so hot & humid here, and there is so much social pressure to be out! doing! things!
prepping for winter

As you may know, I’m a bit anxious about the cold and dark winter ahead. Recently, I wrote a text to a raised-on-the-east-coast friend asking for recommendations for winter essentials, (both emotional ones and product recs), and her responses made me feel a lot better. So I’m here today, asking the same of all of you (if you’ll have me!).
I recognize summer’s merits — the produce is unparalleled, the flowers are out of this world. People are out and about with smiles on their sleepy, sun-kissed faces. It feels like a months-long celebration, and I take so much pleasure in seeing how much other people love summer. But for me, it’s physically challenging — heat flares my chronic conditions and I often need to be indoors on those peak summer days. So in an effort to make the most of it while honoring my body’s limitations, I’m doing what I always do — finding my way with textiles 😇 .
I’ve been wanting to sew more complicated garments for years, but I’ve been procrastinating. In fact, this year I avoided garment sewing by working on literally anything else (I even went as far as learning how to upholster a whole Victorian chair, you’ll recall). But something came unstuck around the solstice, and I finally got down to business. I gathered my inspiration and materials and got to work.
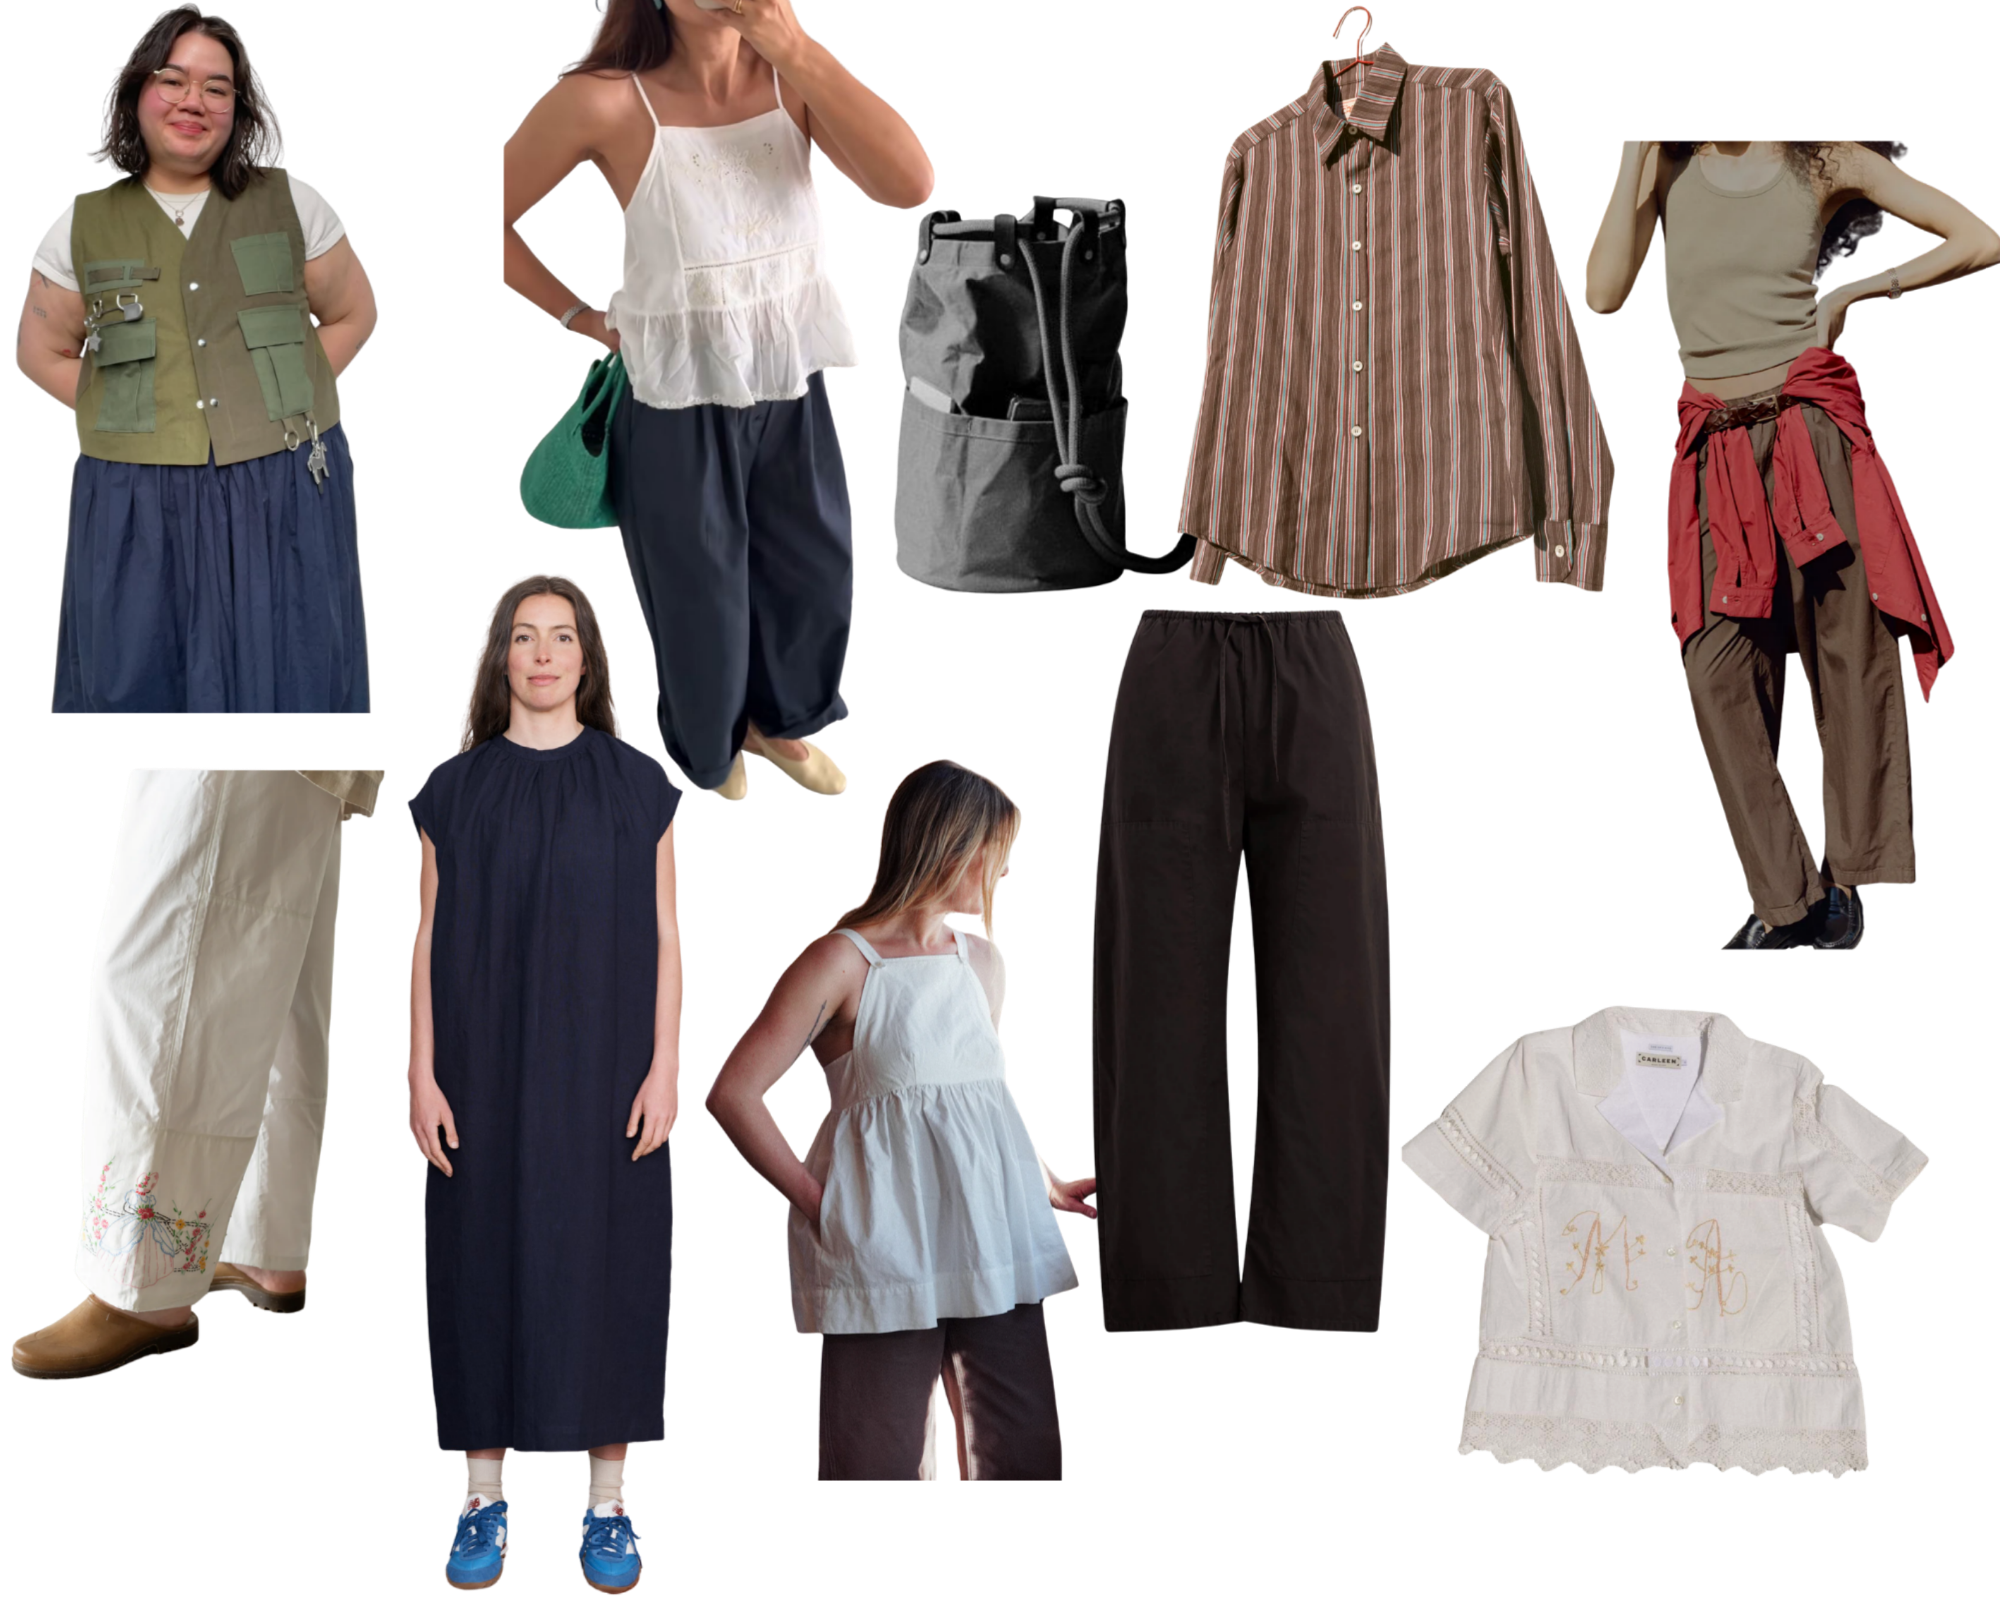
With each of these projects, I’ve gotten a little more confident and a little less grouchy about the process. I’m learning when I can cut corners to save energy (e.g., just cut the pattern out without tracing it first! It’s fine!). I’m letting myself get creative when I make mistakes, and in so doing, finding a new level of self-compassion, and so far, I don’t think the results are suffering :)
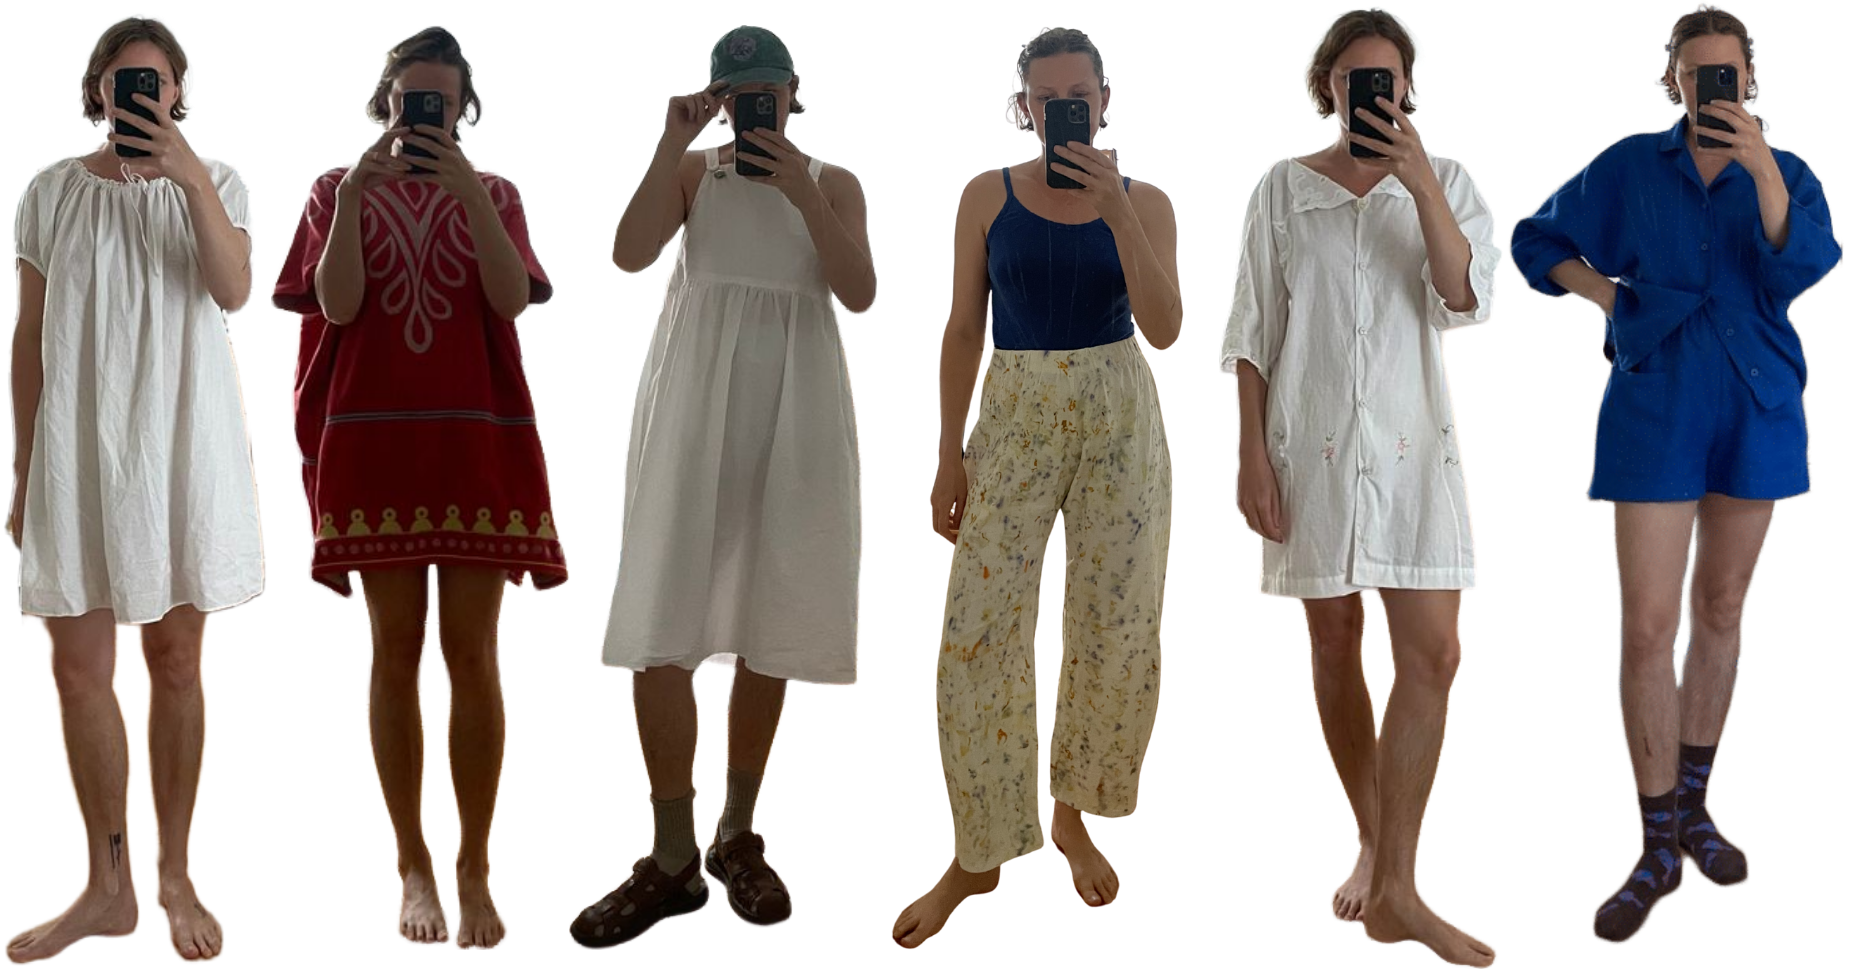
what I’ve made so far
My first button down
Pattern used: Paper Theory Agnes PJ top
Skills built: buttonholes, collar
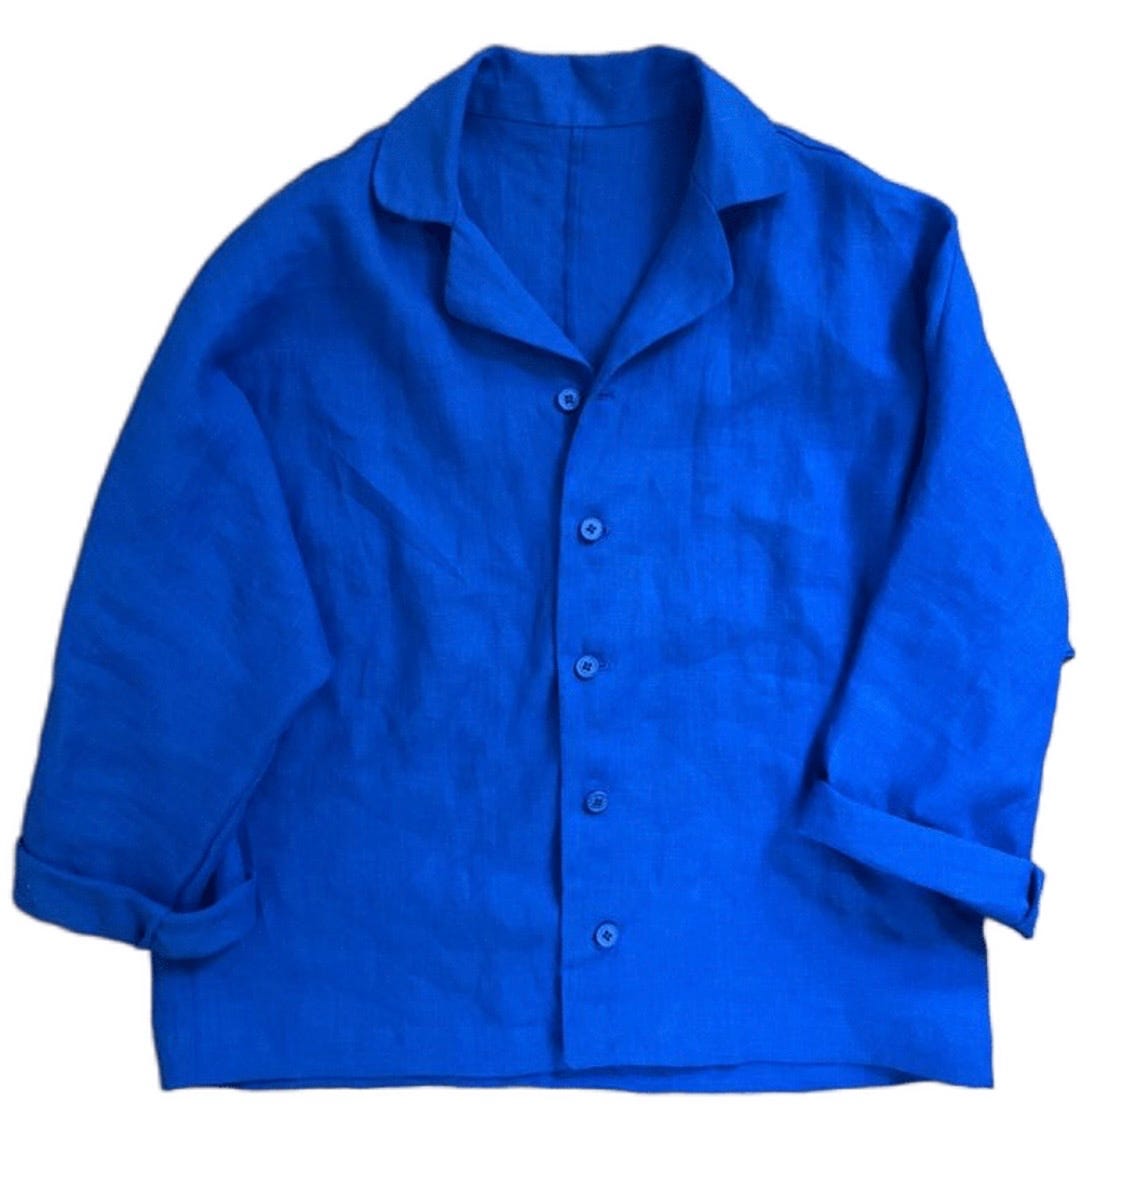
I’ve been wanting to sew a button down for years, but I kept dragging my feet. I used a pattern I already had printed, even though I wasn’t super excited about some of the design details (namely the batwing/grown-on sleeve). I used Merchant & Mills linen I bought a few years ago for my birthday, and ended up getting matching cotton buttons to match (I love them!). I’ve ended up loving the shape and fit of this! The linen is drapey enough that the sleeves look perfectly nice. An educational project and a pleasure to wear.
Matching shorts for my PJ top
Pattern used: Matchy Matchy Sewing Club Weekend Chore Shorts
Skills built: practicing cutting crossgrain (I ran out of fabric lol) & patchworking the pattern pieces, making drawstring casing (really just buttonholes)
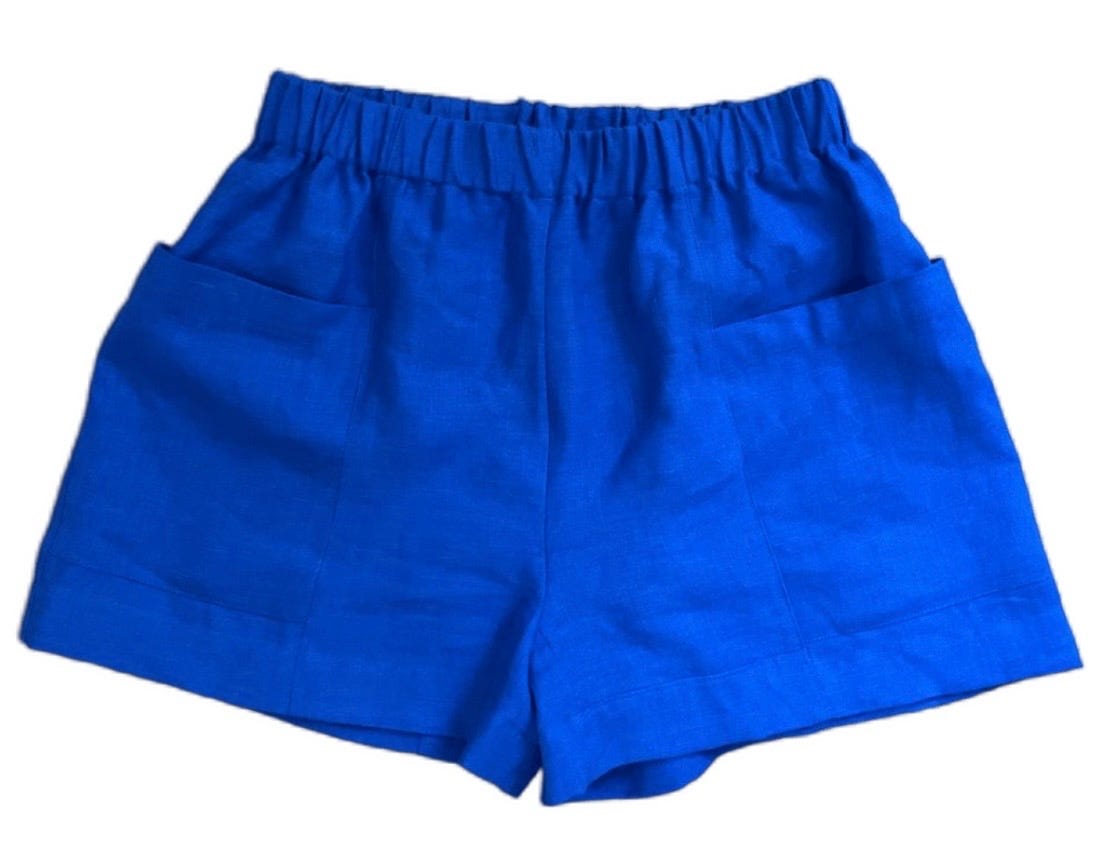
My original plan was to just make the matching shorts for the Agnes PJs (since I also already have that printed & have made it about 4 times), but I didn’t have enough fabric. Instead, I used the Matchy Matchy pattern because it’s designed to be cut from a patchwork of many panels. Even still, I had to cut on the crossgrain & omit the back pockets to eek this out. I enjoyed this sew a lot! The pattern came with printed labels for each of the pieces, a real pro move that made putting it together a lot more seamless (errr.. seam-full? but straightforward). So far they’ve been super comfortable, the rise & inseam are exactly my preferences.
An Apron Dress
Pattern used: Tessuti Romy Top
Skills built: overall-style straps “epaulets”(?), practicing bust darts
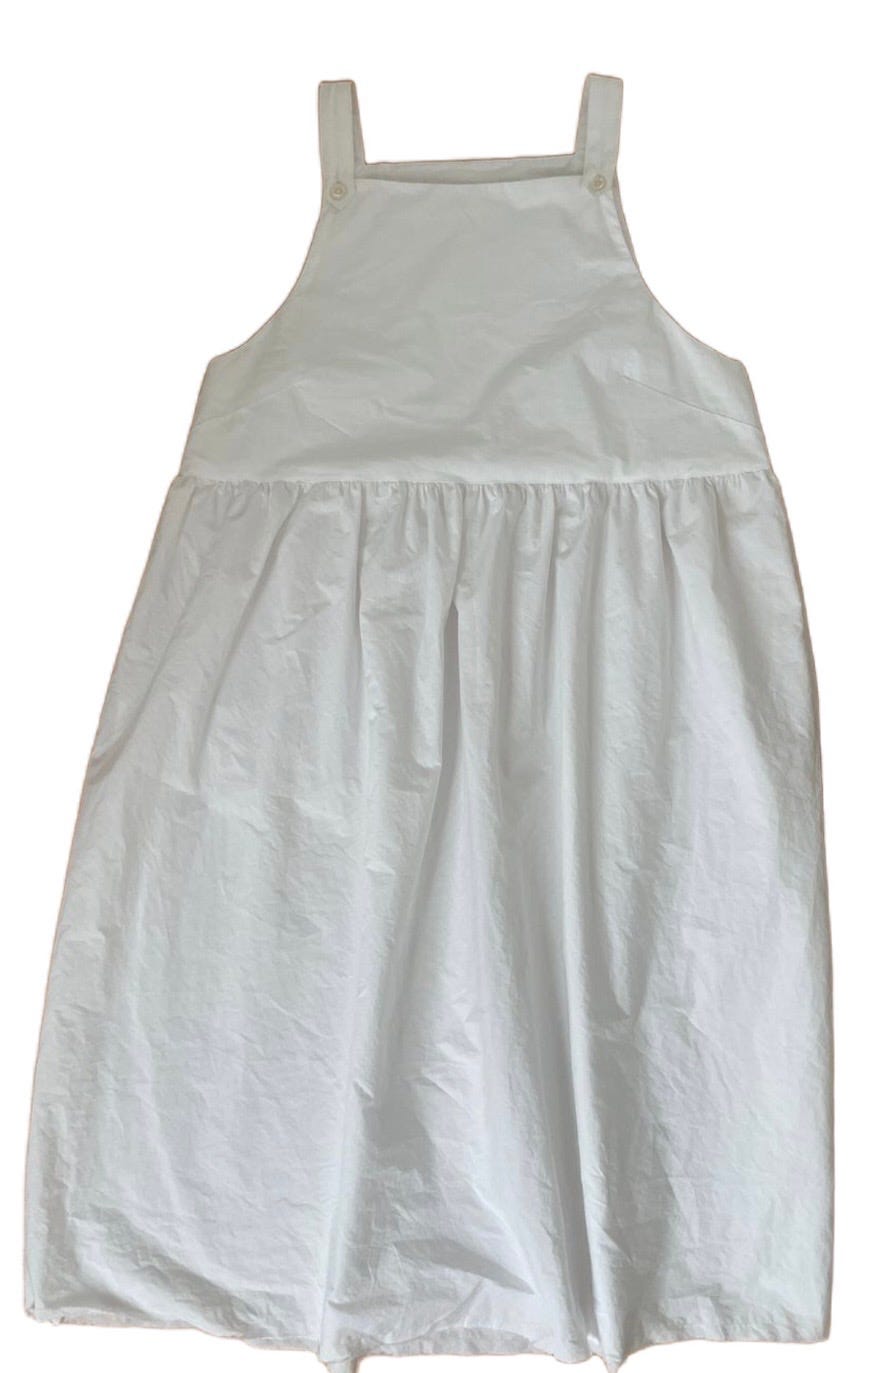
At first I thought I was making a top with a deep hem, but then I cut a dress and really liked the shape of it, so I decided to leave the hem raw (couldn’t afford to lose the length, and I liked how it made the dress feel less precious) with just a straight stitch to keep it from fraying toooo far. I found the buttons in my Oma’s stash which has made it feel extra special. I’ve worn it a ton so far and I love the way it fits.
A dupe of my trusty If Only If nightgown
Pattern used: Olive Flora Dress
Skills built: using a rolled hem foot (I finally bought one of these - worth it!), creating a channel for a drawstring from bias tape, making self fabric cording
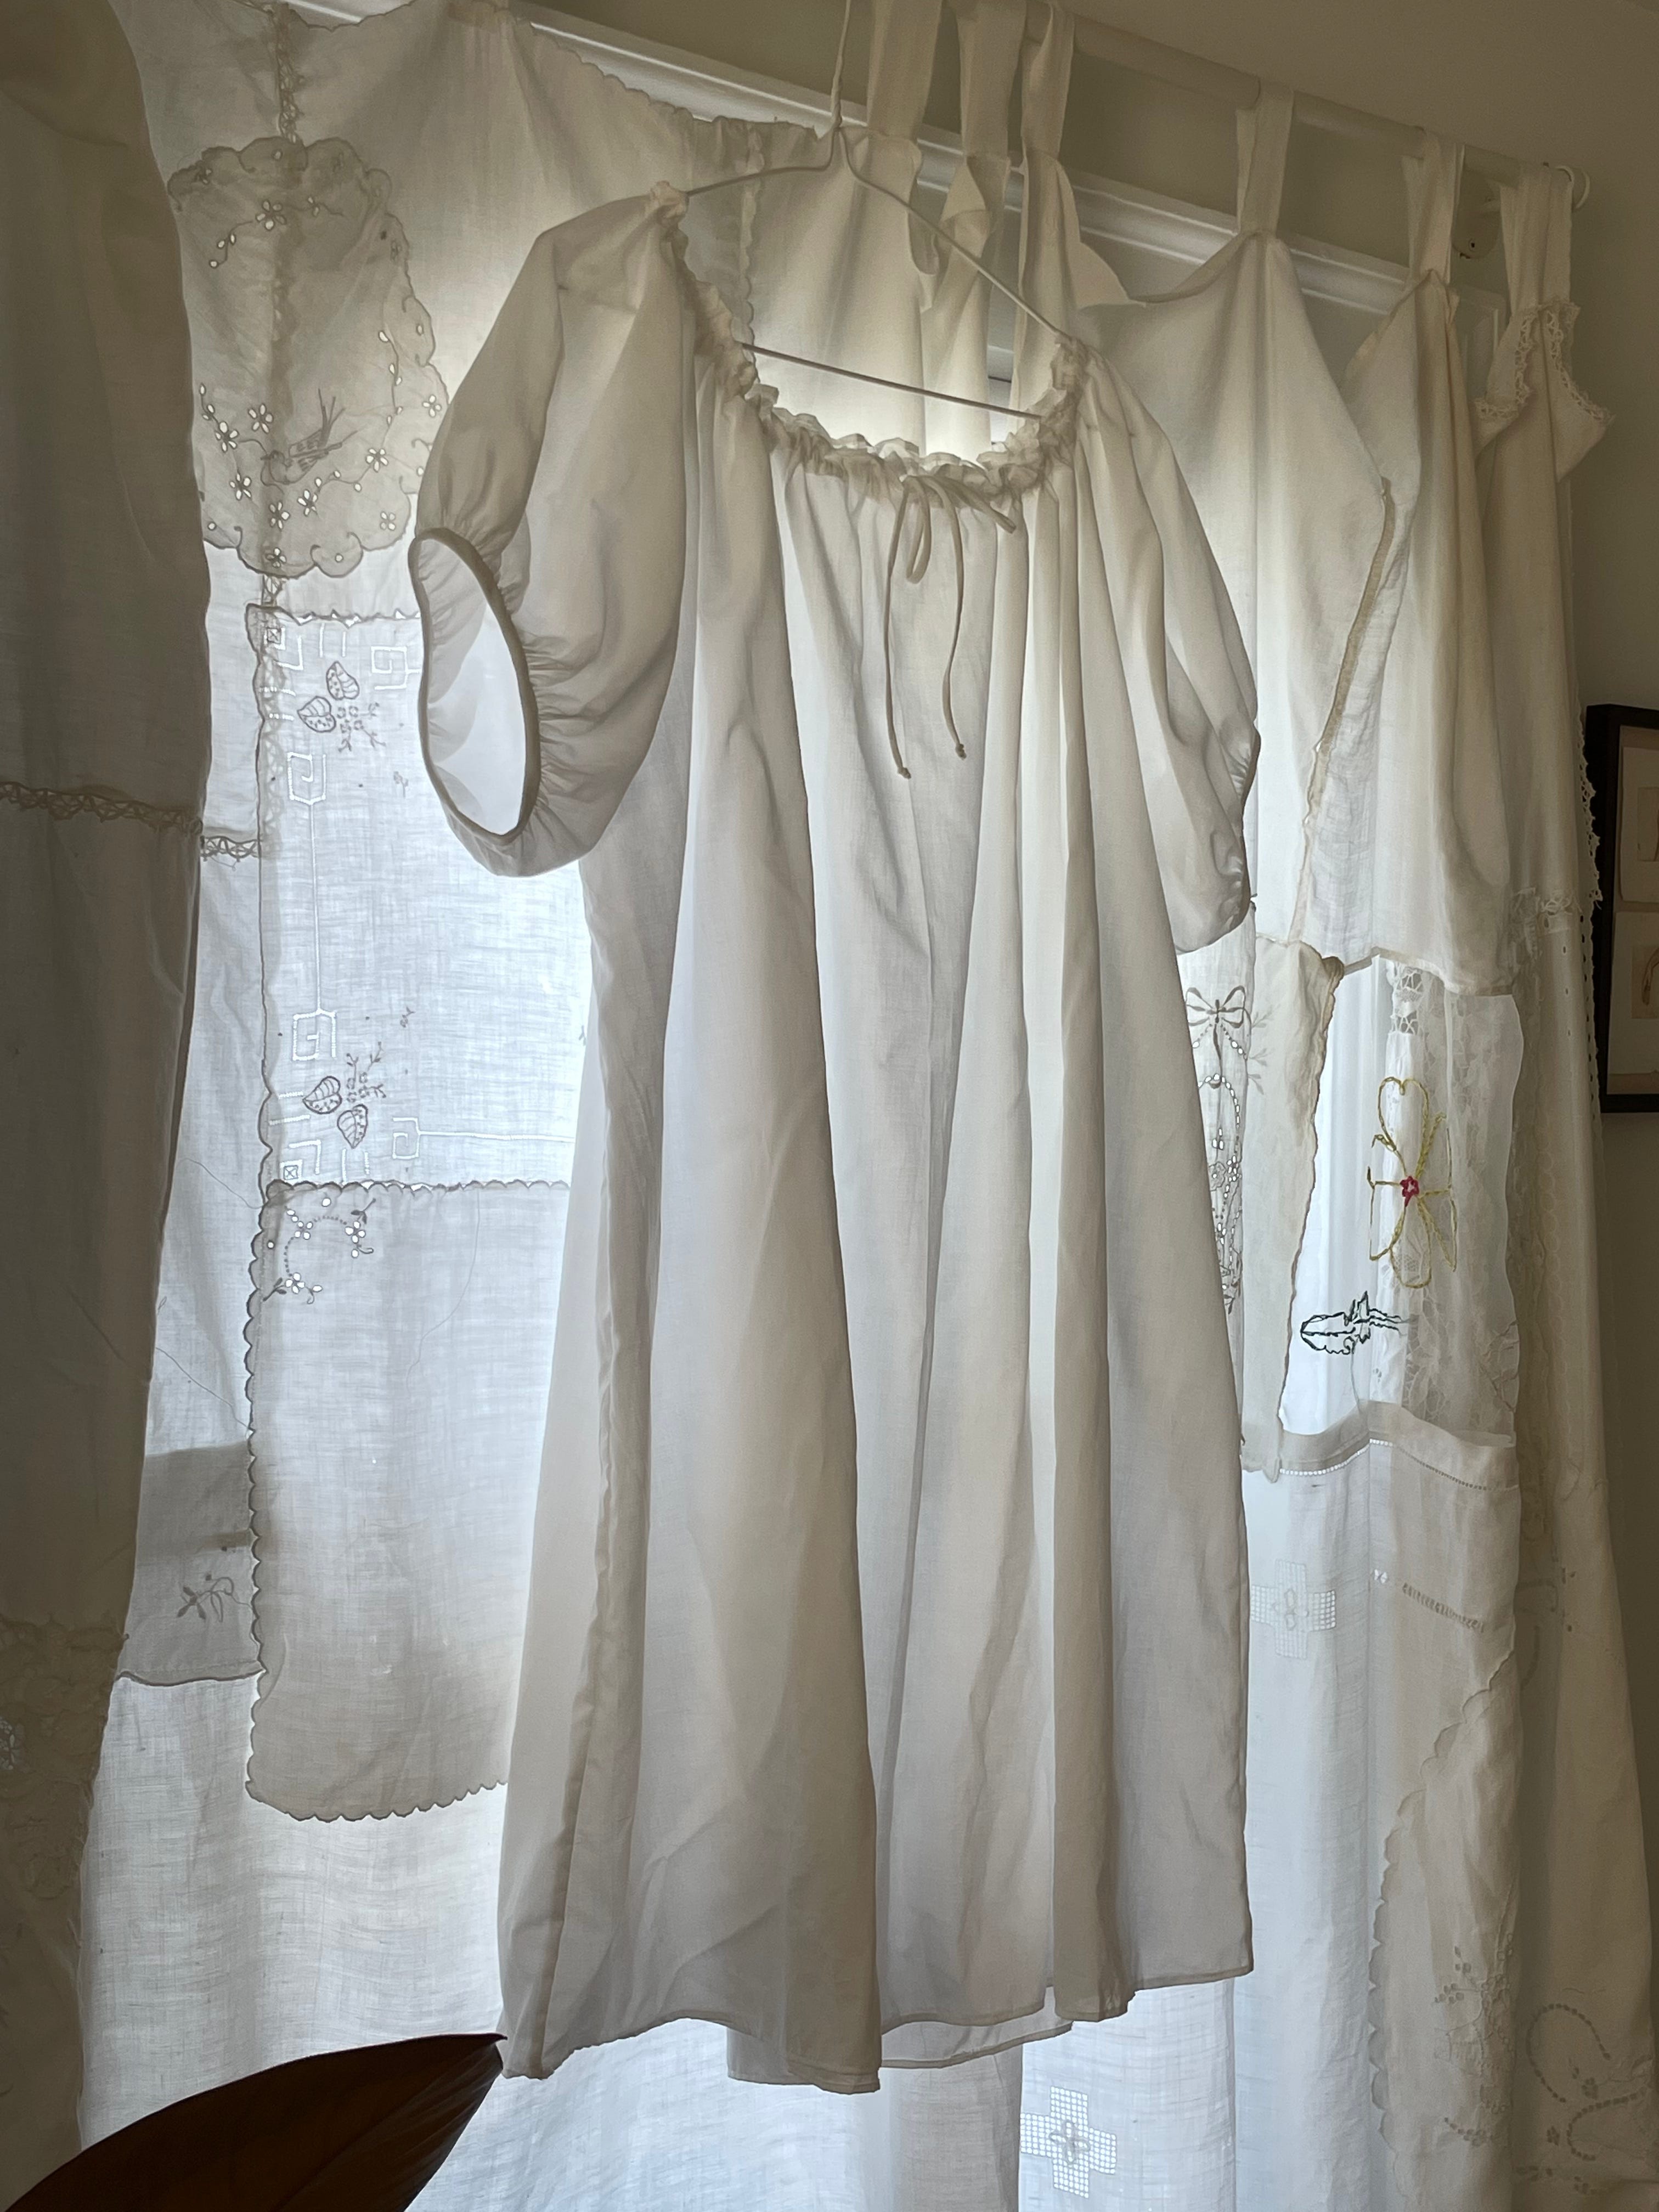
My original nightgown was a Christmas gift in 2023 & I’ve worn it to death, so I sourced some voile from our local fabric shop & got to work. I traced just the bust area (neckline & raglan sleeves) from the pattern and eyeballed the rest. Instead of finishing the neckline with bias tape, I hemmed it with the rolled hem foot and then made a channel about an inch down from there for the cording. I finished the sleeves with bias binding because I got overwhelmed by trying to smock it like the original (though my sewing machine seems capable of this, which is cool!). Another one I’ve loved wearing and have already managed to stain — such is the fate for all my whites, I guess ¯\_(ツ)_/¯
Pants for dance camp!
Pattern used: Thread + Sprout Dance Pants
Skills built: altering a pattern (lowering the rise & lengthening the inseam)
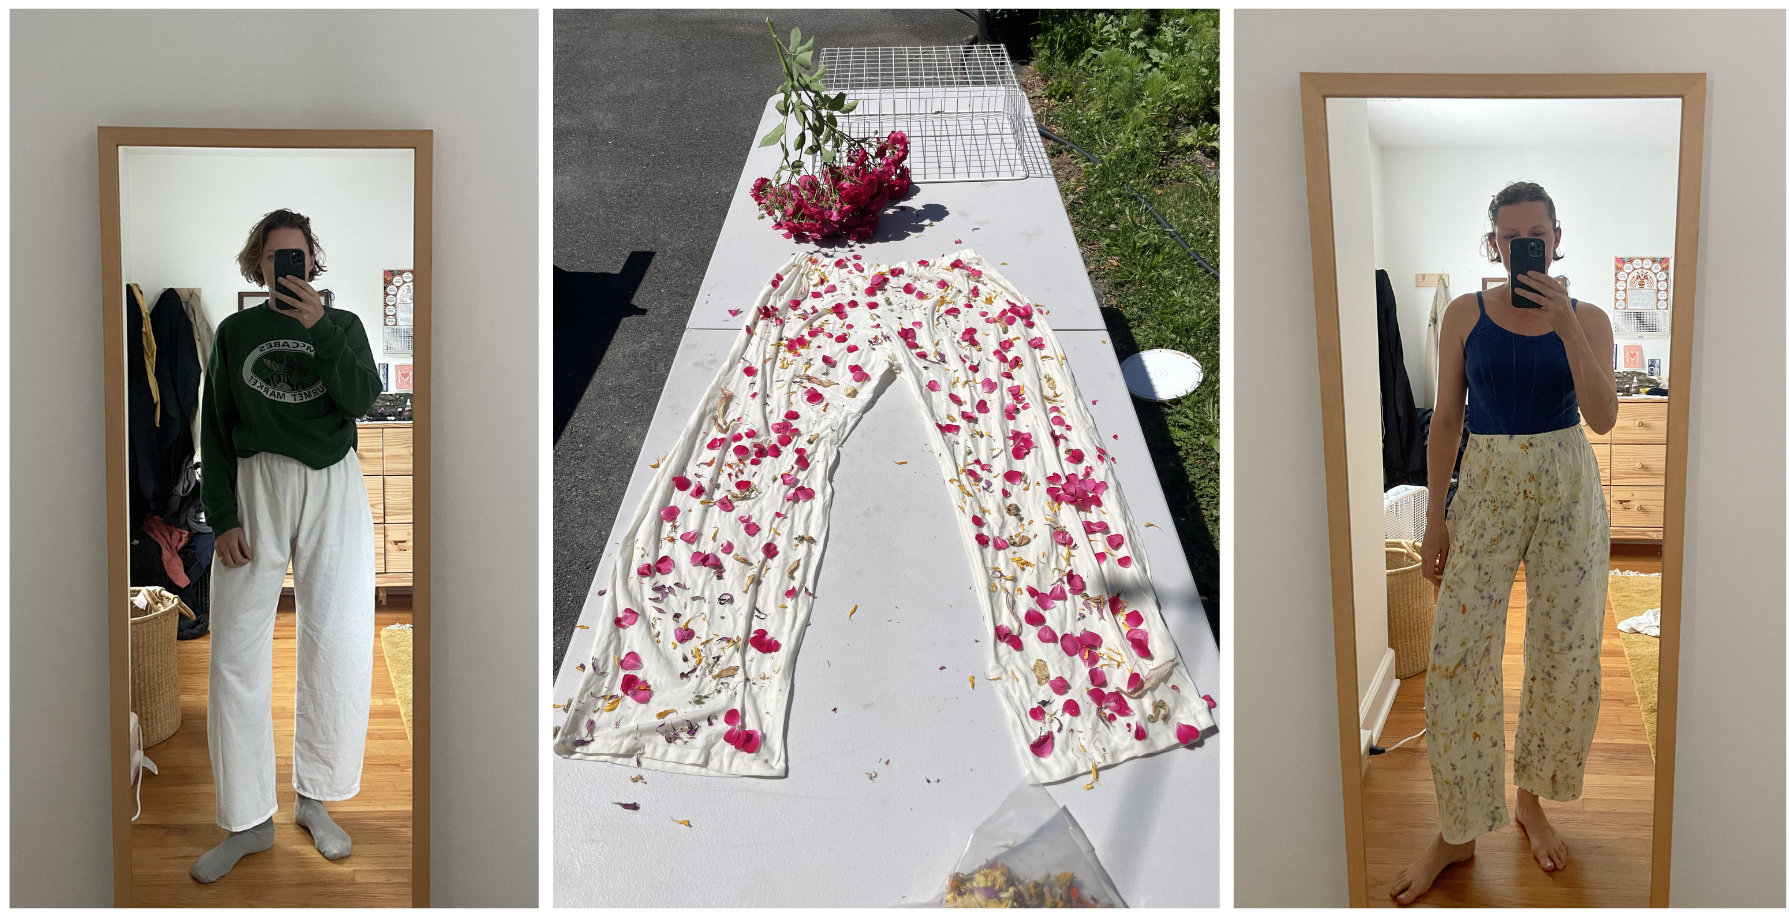
These pants were a bit more voluminous than I wanted, so when I was between sizes, I took the lower of them, and took out 2 inches from the rise (which meant I needed more inseam, so I added 4 inches there). I didn’t have enough fabric for this lying around, so I used a 10 year old IKEA duvet, saying “this will just be a toile”. Much to my surprise (as evidenced by the barely finished seams, I used pinking shears because I wasn’t even expecting these to be remotely wearable), I loved the fit. The one thing I didn’t take into account during my pattern modifications was how to adjust the pocket location with the rise adjustment, so I just omitted them. Next time, with nicer fabric, I’ll try to figure that out. And I’ll add a drawstring! I also dyed these with flowers I grew in my yard! I have so much more to say about this, but I’ll save it for another missive :)
A beach coverup from a tablecloth
Pattern Used: Fold-back Collar Dress from Zero Waste patterns: 20 projects to sew your own wardrobe - Birgitta Helmersson
Skills built: practicing zero waste pattern cutting, buttonholes, binding hems.
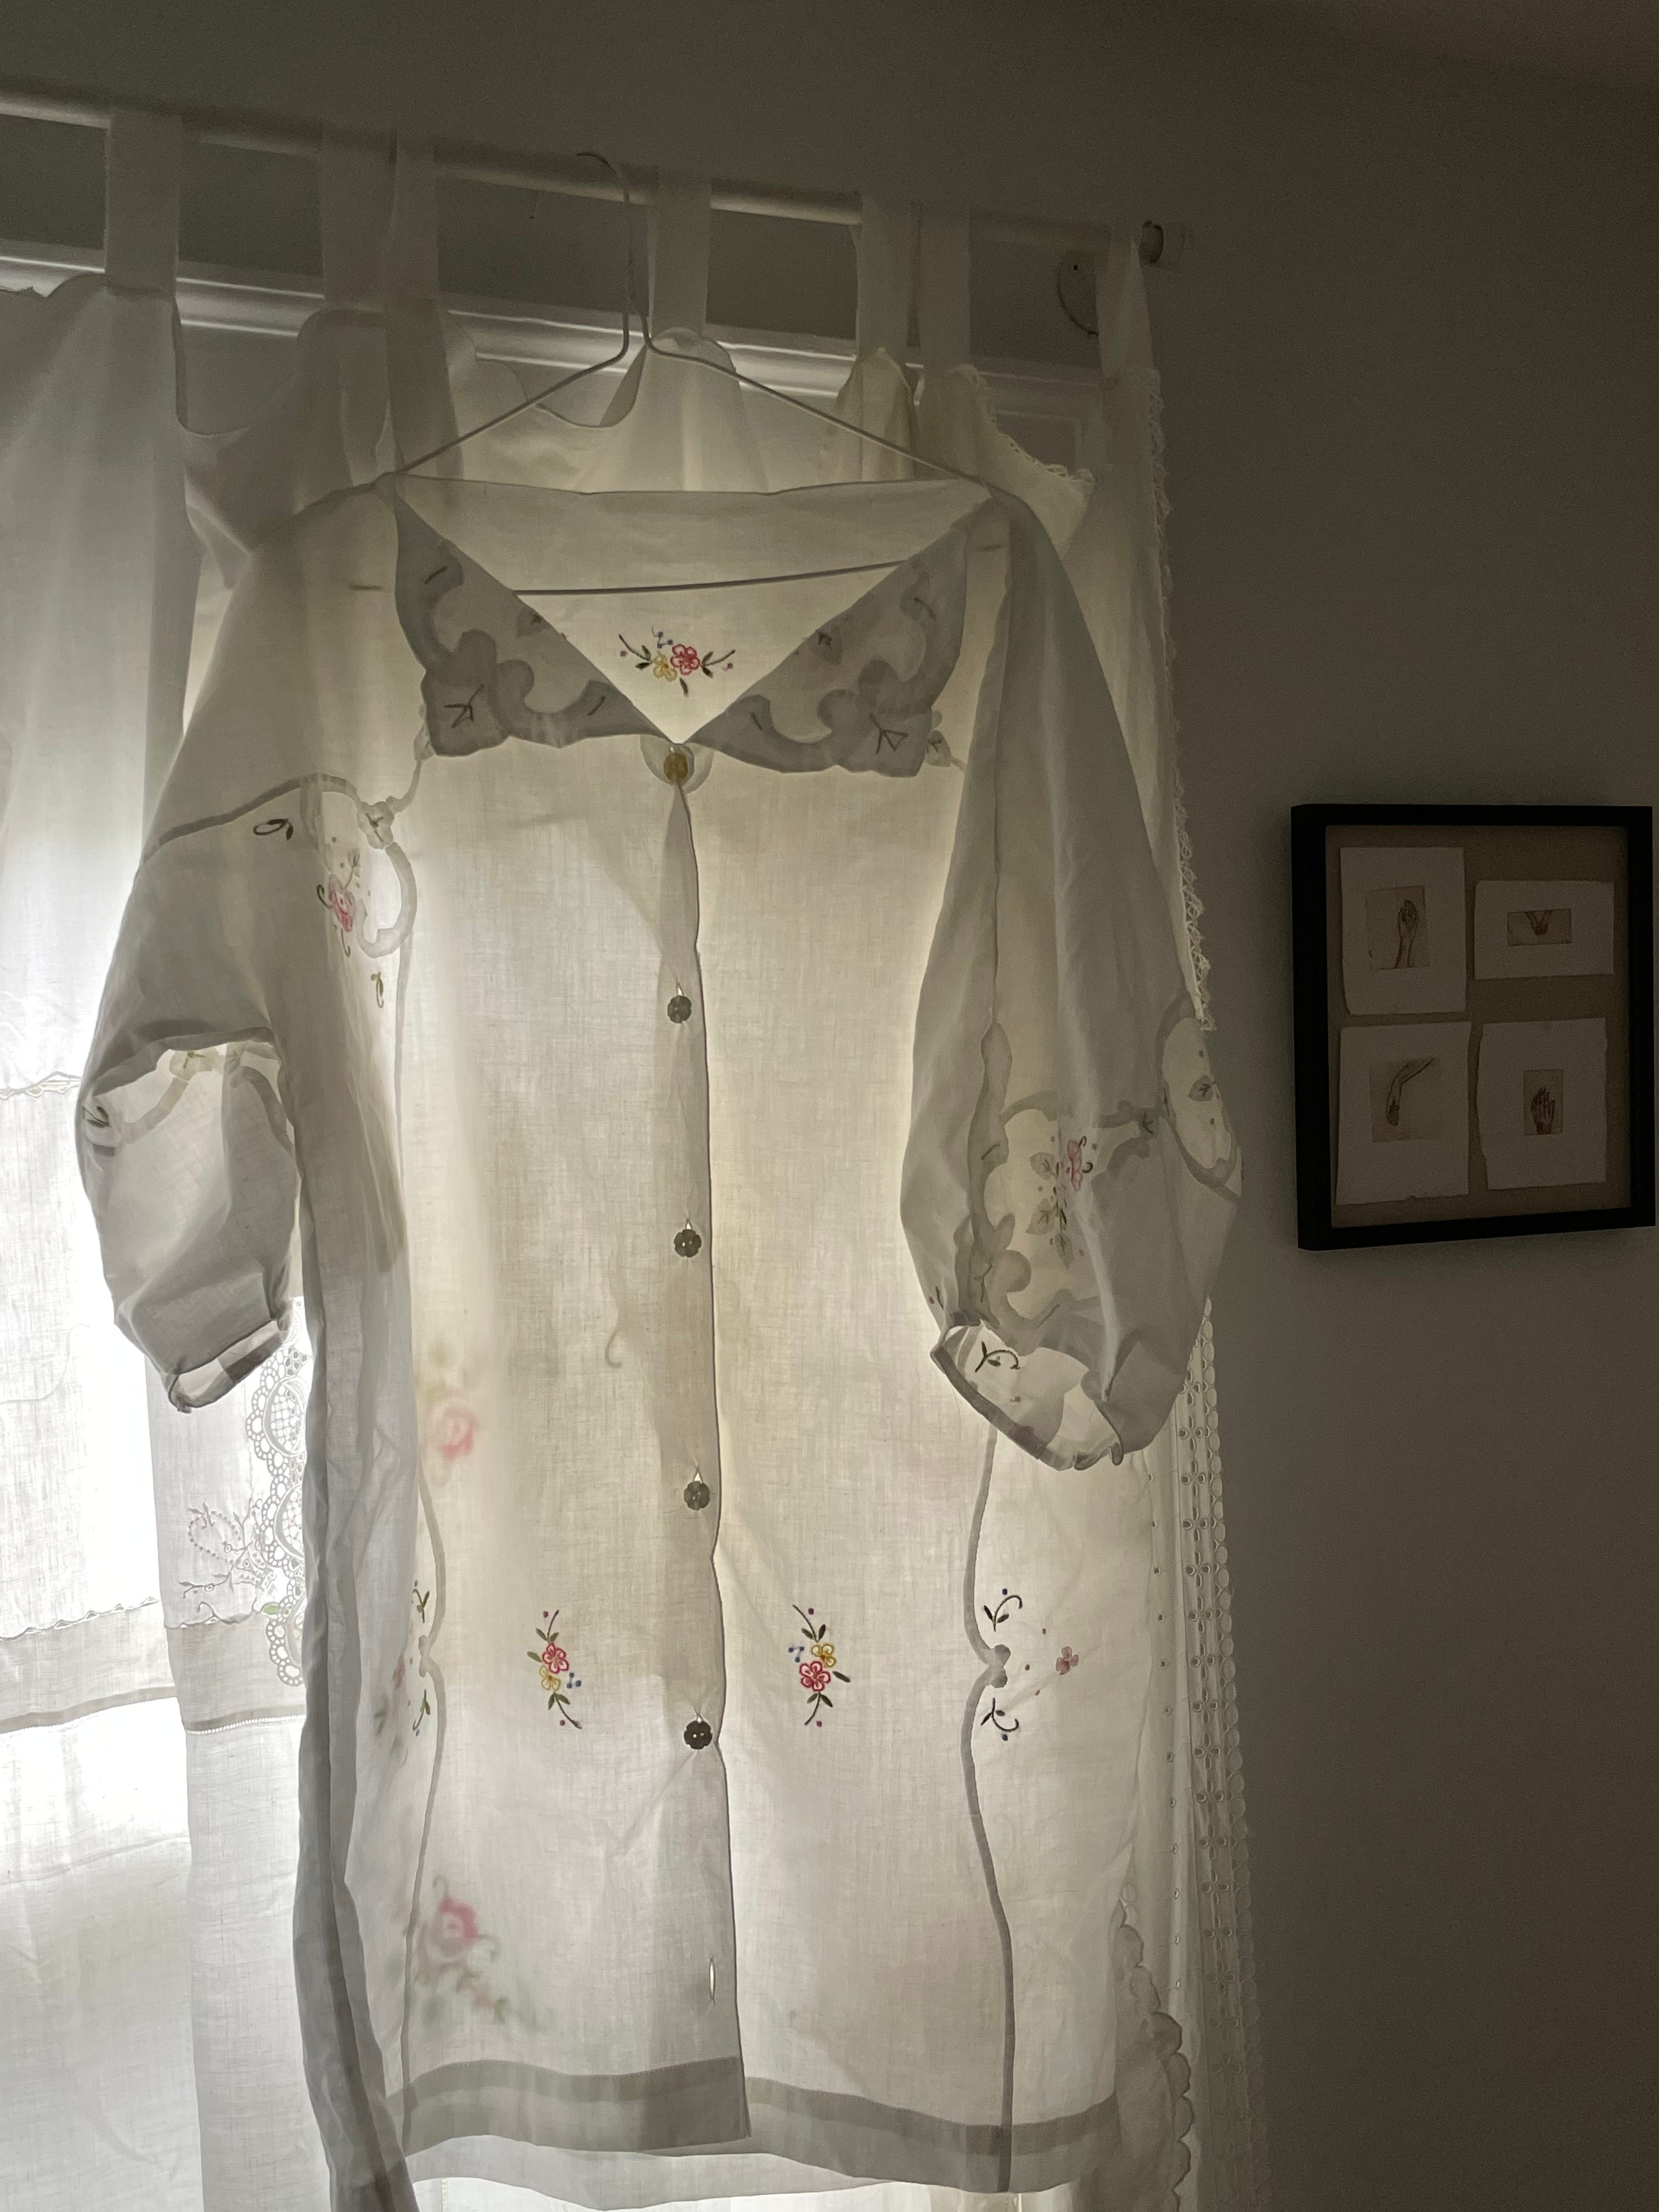
I have so much respect for how clever Birgitta’s designs are and her commitment to zero waste pattern-making. For me, this was more of a process than outcome project. I initially wanted to use this tablecloth for a Carleen-inspired short sleeve button down but I couldn’t make sense of how the pattern pieces should be laid out. It was really interesting to cut and assemble a pattern in the zero waste methodology. I made some small adjustments to make the garment more wearble for me (like adding some little pleats to the sleeves so they weren’t straight rectangles).
Dana’s Nana’s Towel Coverup
Pattern used: As implied - Dana’s nana is responsible for this brilliant idea. :,)
Skills built: sewing with towels!
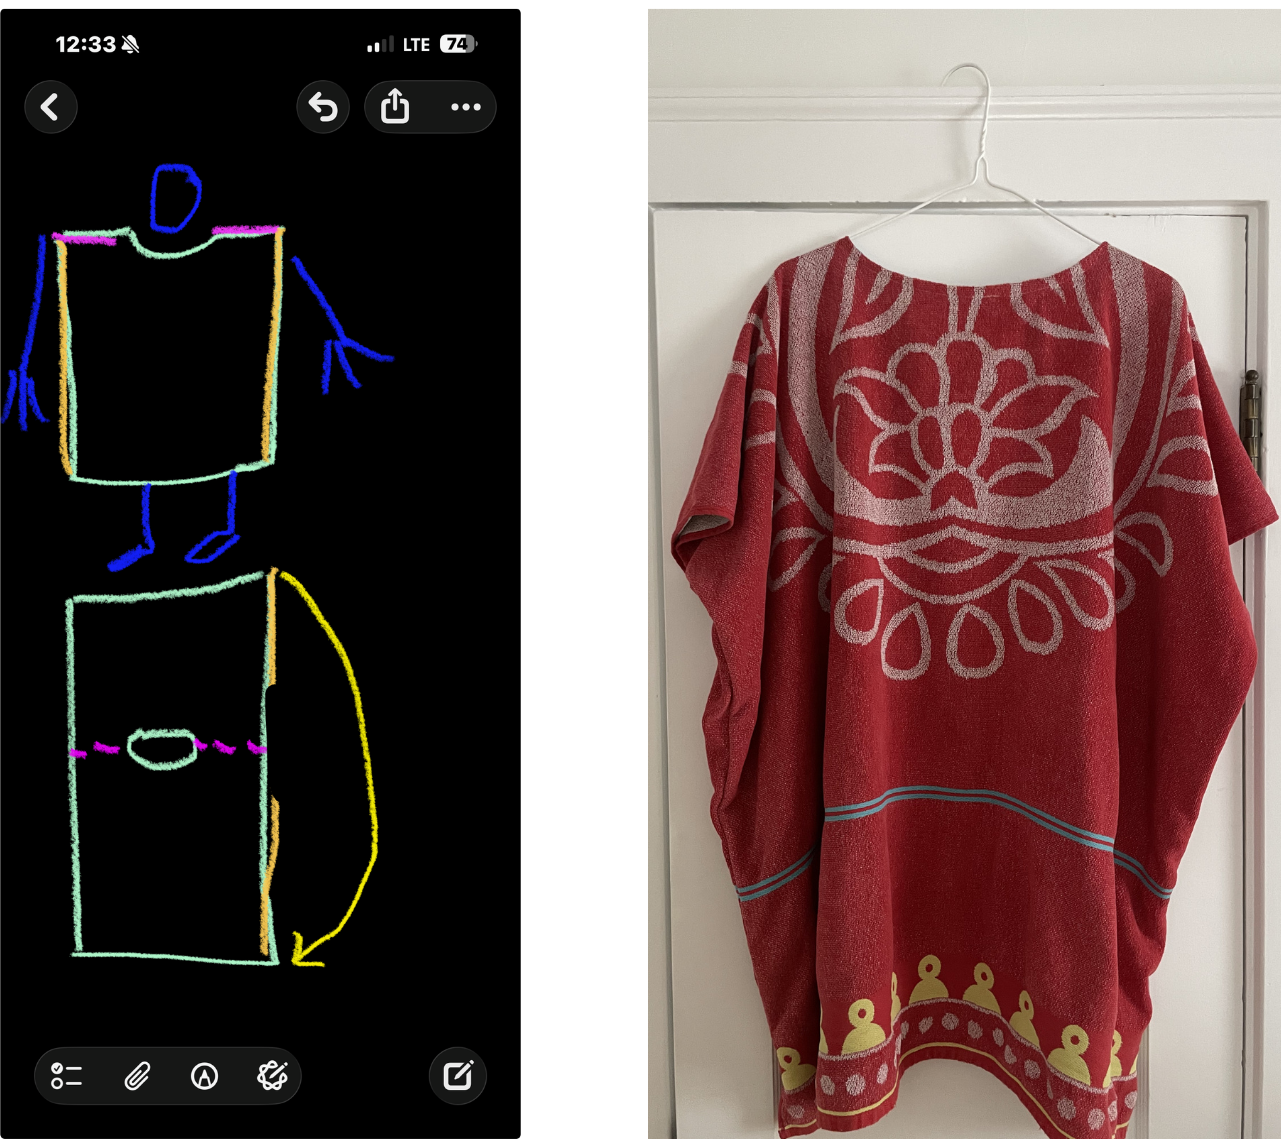
In the queue
Currently cutting: a toile from the same poplin as my apron dress
Once I get the fit right, a final edit from this gorgeous striped fabric (a word to the wise: ships from France & may have some duties to be paid — whoops!)
A Francli Craftwear-inspired “ditty bag” from the oilskin leftover from my wool-stuffed vest. Mine will not be nearly as beautiful as theirs, but the concept feels very applicable to my life (ie throw a bunch of crap in a bag & take it to the river)
More Romy tops/dresses made from vintage tablecloths (see moodboard)
BF Parker Pants? (need to buy some poplin for this)
Now that we’ve broken the seal, who’s to say what will happen? Stay tuned…. :-)
For anyone looking to buy that striped fabric from a US supplier, you can buy it here ☺️ I was just eyeing it last week haha! https://openstudiosewing.com/products/weave-line-oat-chocolate-fabric
just love these dispatches, always end up feeling so inspired